Babble Tracker Quickstart
This guide applies to the Official Babble Tracker, and should cover DIY versions that use similar hardware/firmware. It will walk you through the complete setup process, from initial connection to calibration and troubleshooting.
For official Babble facial trackers, flashing the firmware is not recommended since they arrive from our warehouse already fully flashed. You should only flash firmware if you know what you're doing and are troubleshooting.
Getting Started
Hardware Setup
Plug your tracker into your PC
- Connect using the USB port on your tracker
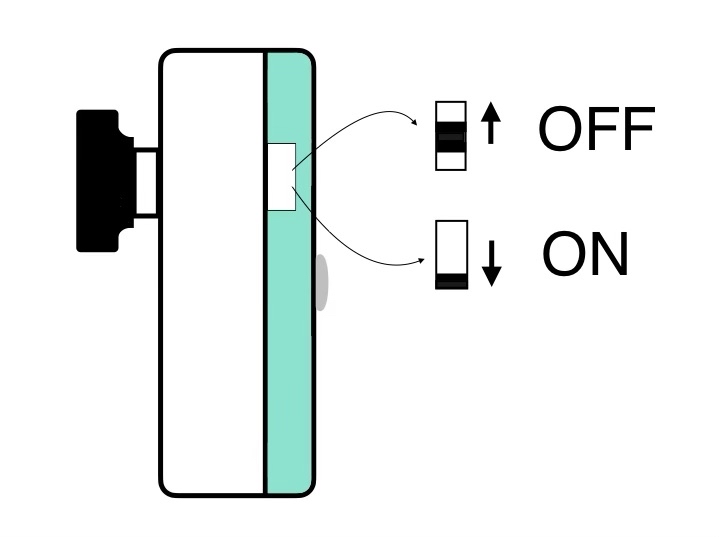
- Make sure the switch is in the "ON" position, as seen below
- A bright green OR red light should appear on the back of the tracker
- You should hear a connection sound when properly connected
- The tracker will take a few seconds to boot upon receiving power
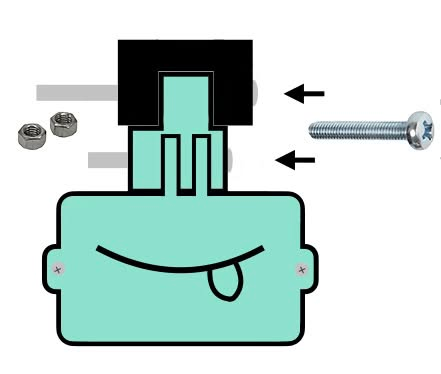
- Follow this video for how to assemble your tracker: Unboxing and Assembling your Babble Tracker
As a quick reference sheet, this is how it should be assembled.
Software Setup
Windows
- Install Baballonia from Steam
- Alternatively, Get the latest version from our Github. Download the installer and run it.
macOS/Linux
- Currently, we do not offer installers for these platforms. You will need to build these from source.
- For assistance building Baballonia on these platforms, please contact us in our discord server.
- Our Legacy App can be run from our installer scripts on the Github
For more detailed instructions and troubleshooting information, head to the firmware guide.
Tracker Mode Selection (Wired or Wireless)
Now that you've got your Babble Tracker plugged in and Babbalonia installed, you'll need to complete device setup.
Notes for Linux users only
Linux Users: If you are experiencing issues configuring or opening a Babble Tracker camera, there are a few things you can do:
- Try the Steam scout 1.0 runtime (not sniper 3.0).
- Install
libudev, building from source, or making/joining theplugdevgroup. - Install the 99-platformio-udev.rules.
- Run the app via Proton.
Linux: Babble Boards do not support UVC/Serial wired, you must use a wireless configuration.
Linux: We only support the Steam and GitHub releases, not the AUR package.
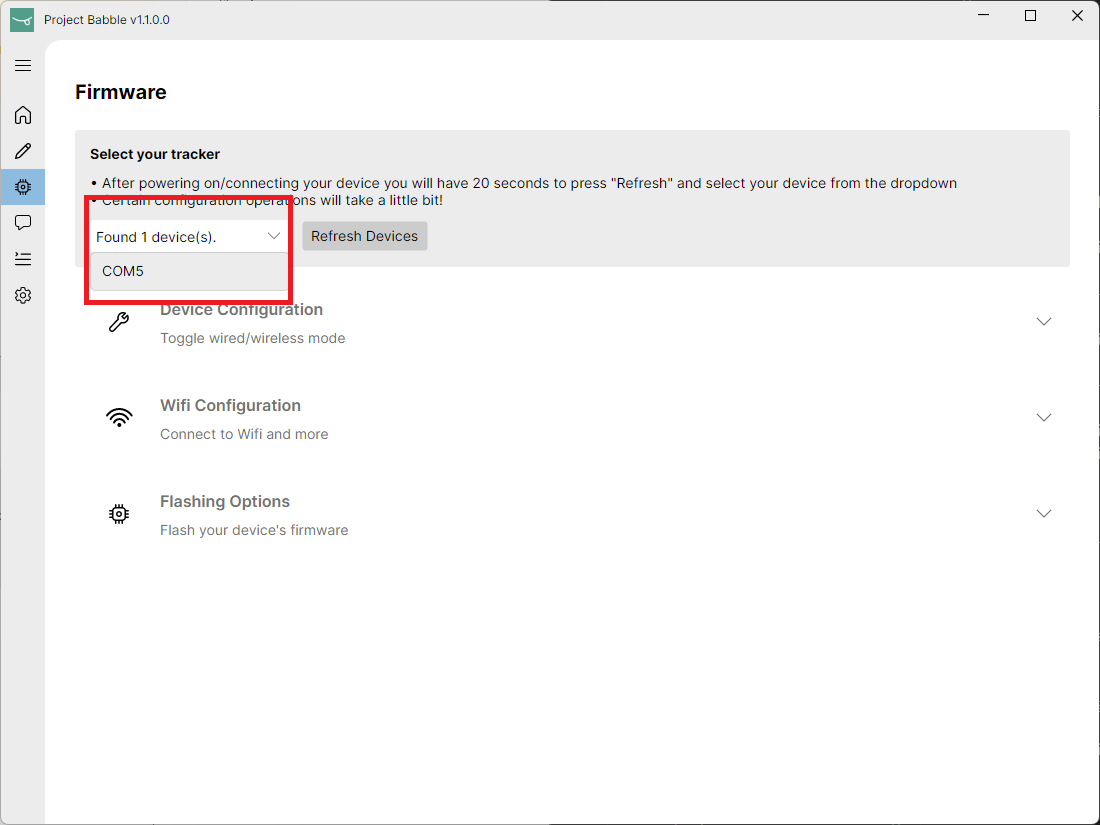
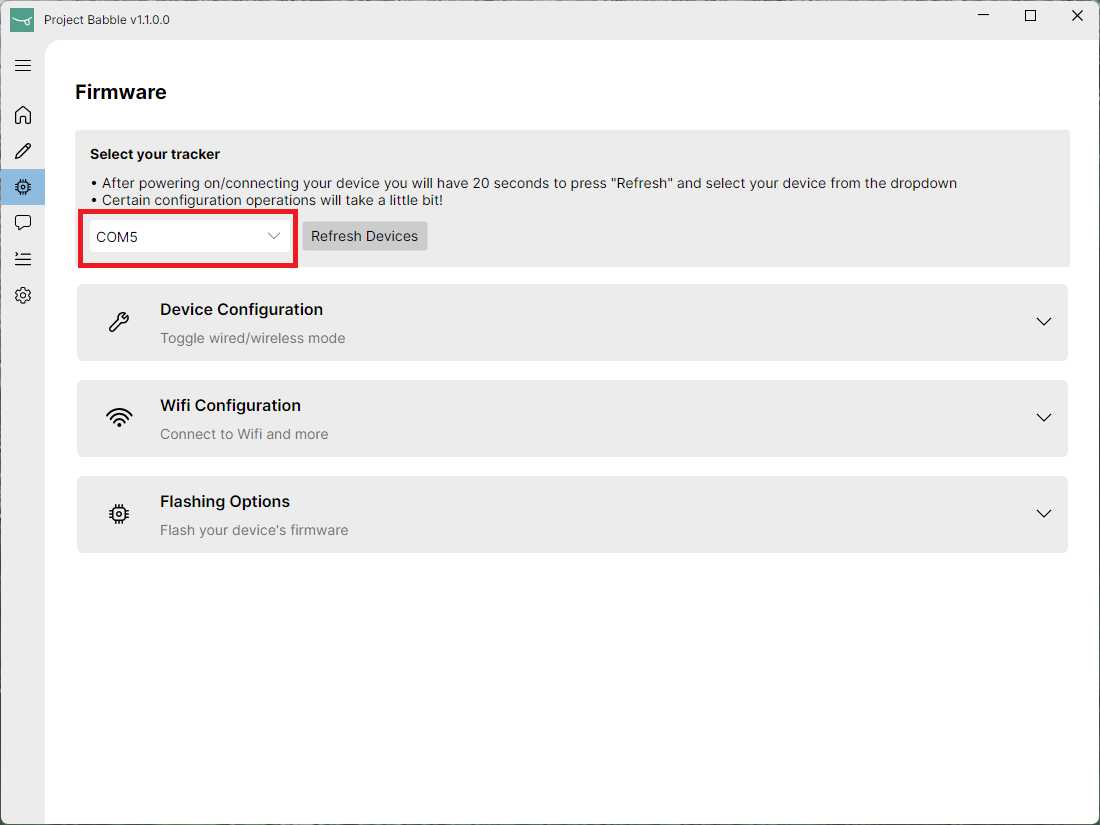
- Open Baballonia and navigate to the Firmware page:
- Plug in or unplug and replug your tracker to make sure it's in Configuration mode.
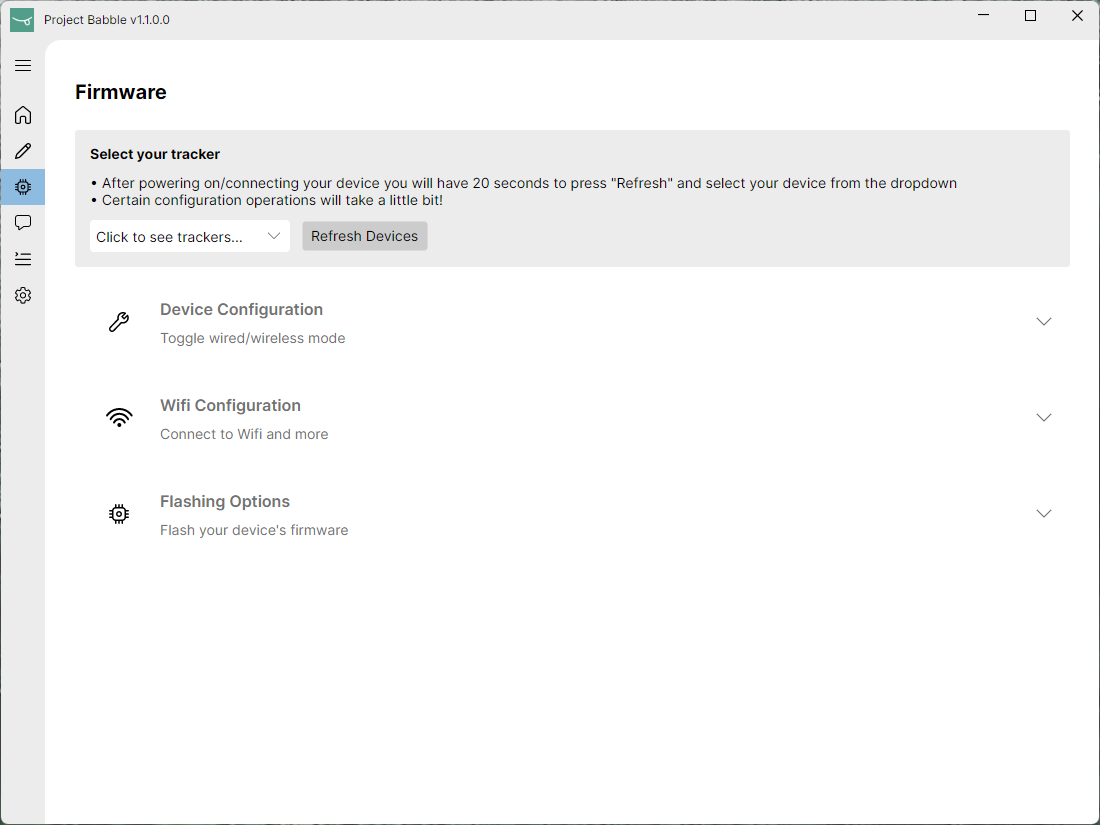
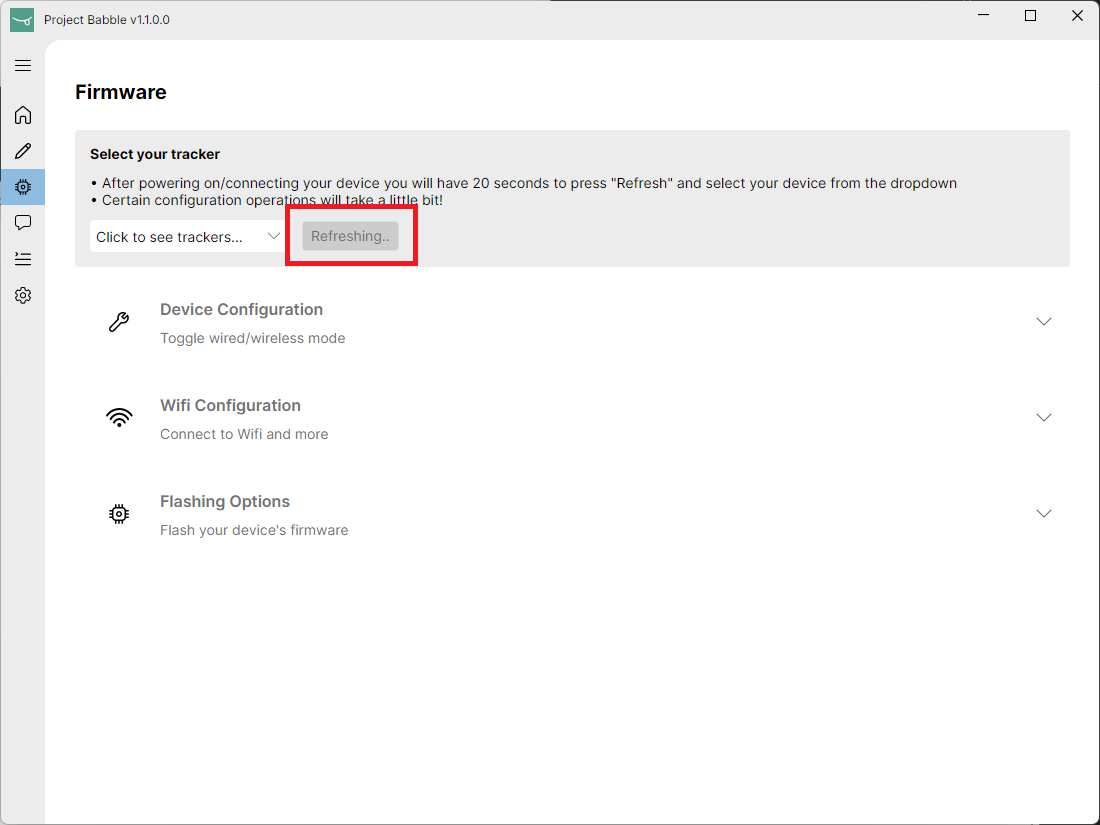
- Once your Babble tracker is in Configuration mode, select Refresh to see the connected trackers. Once you see yours appear, select it:
Upon connecting the tracker, you will have a 20 second window to press 'Refresh'. If you wait too long, you will need to unplug the tracker and try again.
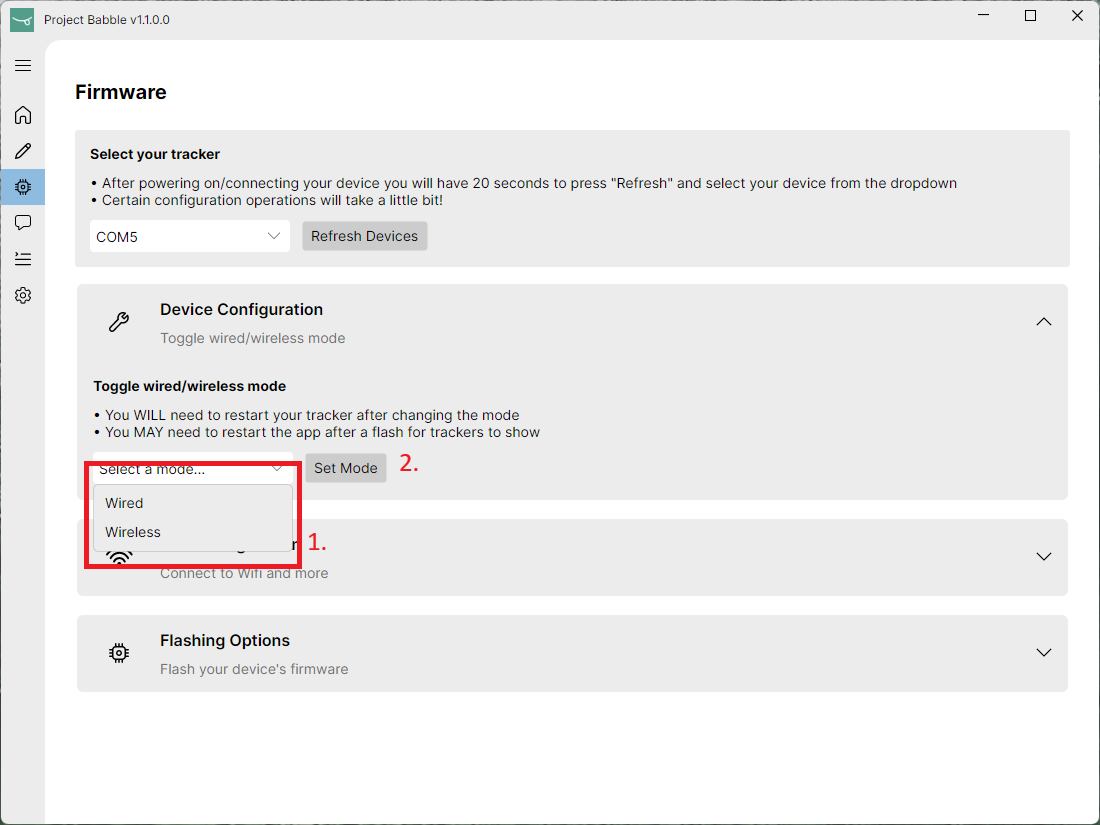
4a. Set your tracker into 'Wired' or 'Wireless' mode:
You must have 2.4Ghz Wifi network for a Babble Tracker or any ESP32 device to connect wirelessly. 5Ghz doesn't work with the ESP32 series of processors, which is what the Babble Tracker uses.
Wired: Your headset has a dedicated USB port for accessories that connects directly to your PC (e.g. Valve Index frunk USB) Wireless: Your headset connects to your PC via Wi-Fi or doesn’t pass USB data to your PC (e.g. Quest 2/3*) *Quest Link via wired Link Cable cannot be used via Wired mode, as Meta Quest Link only streams PCVR to the headset. It doesn't let your Babble tracker communicate to the PC when wired streaming is occurring.
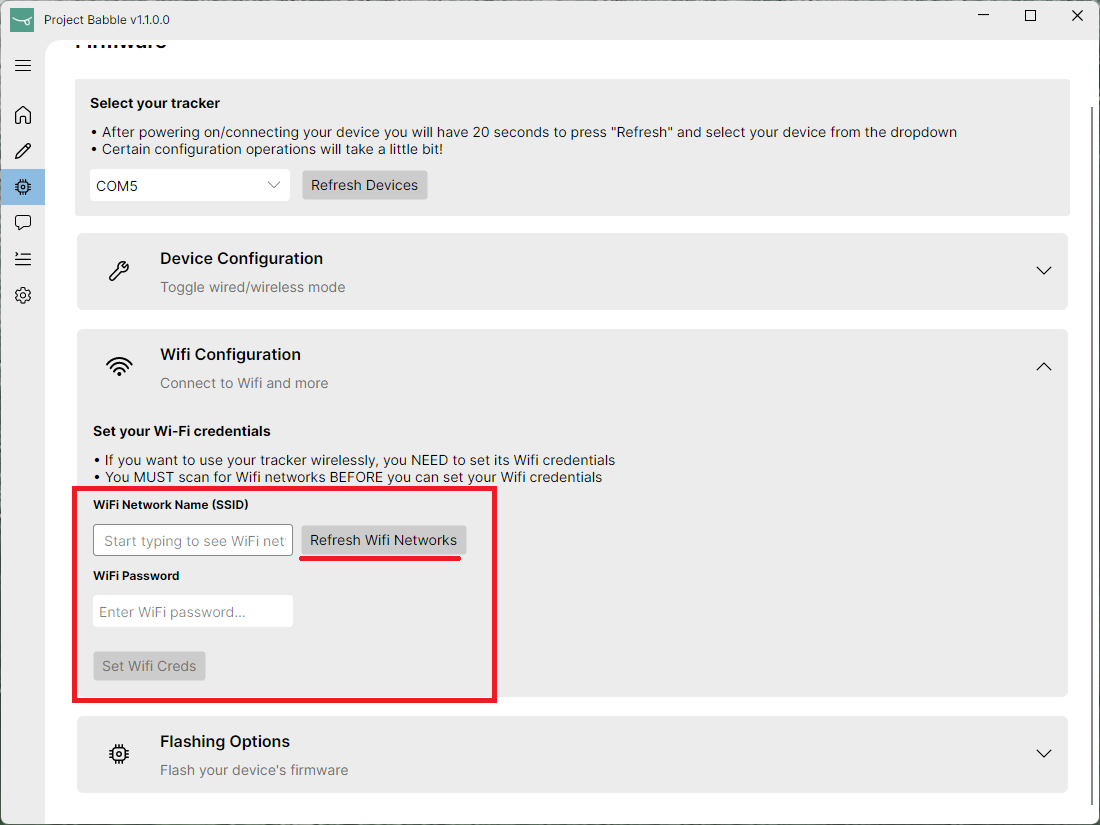
4b. If using Wireless mode, set your WiFi credentials:
You need to press 'Refresh WiFi Networks' before the tracker can connect to a network, even if you enter the SSID manually.
- Unplug and replug your tracker. A few seconds after being powered on, it will start.
If you selected 'Wired' the tracker will now boot into USB camera mode (UVC mode) and function as a USB camera with the device name 'openiristracker'
If you selected 'Wireless' the tracker will not boot into Wireless mode and function as an IP camera on the address 'http://openiristracker.local'.
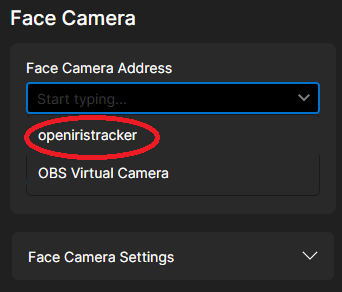
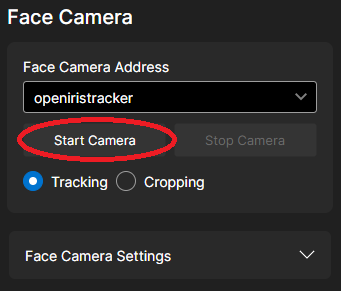
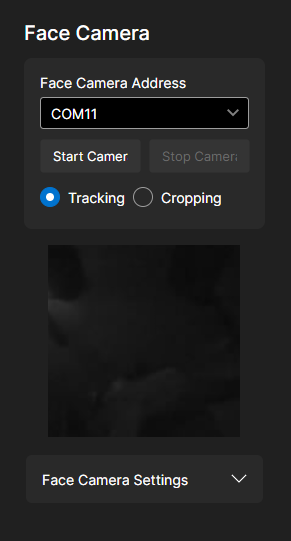
Connect to your tracker
- Open Baballonia.
- Open the dropdown menu.
- Select 'openiristracker' or type in 'http://openiristracker.local'.
- Click "Start Camera" to connect.

Older trackers and DIY solutions running serial firmware will be start with COM//dev/ttyACM followed by a number
In the event your tracker does not show up in the dropdown, you can enter a numerical index for a camera (0, 1, 2...);
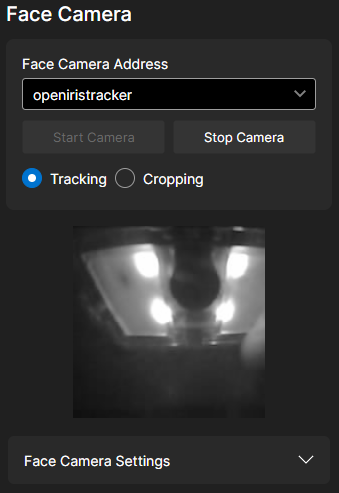
Setting Up The Camera Feed
Before use, you need to properly set up your camera feed:
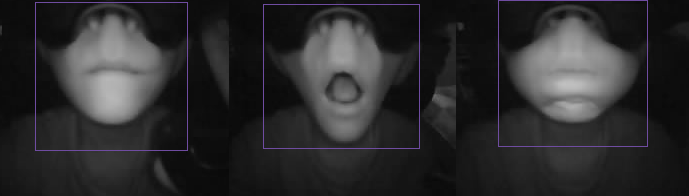
- Ensure proper positioning
- Your face should be evenly and well-illuminated
- The tracker should be able to see your entire lower face and jaw
- Positioned at a slight angle that shows the tip of your nose/nostrils
- Set the crop area
- Set the Face Camera into "Cropping" mode
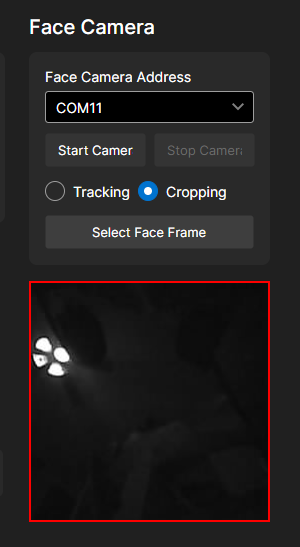
- Click and drag across the image to set the crop area

- Make sure the cropped area includes:
- Tip of your nose/nostrils
- Bottom of your jaw when open
- Sides of your cheeks when puffed
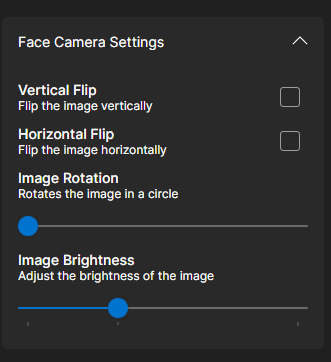
- Don't worry if the image is flipped - mirroring options are available in the "Face Camera Settings" dropdown

- Switch to tracking mode
- Once you've set your crop, set your face camera back into "Tracking"
- You should now see a smooth and cropped video feed from your camera
Calibration
After completing the initial setup, you may need to calibrate your tracker for optimal tracking experience.
For more info about that, please follow the Calibration guide.
Next Steps
To get started with specific VR platforms: